Showing posts with label engagment party. Show all posts

Monday, June 13, 2011

Breaking the Ice

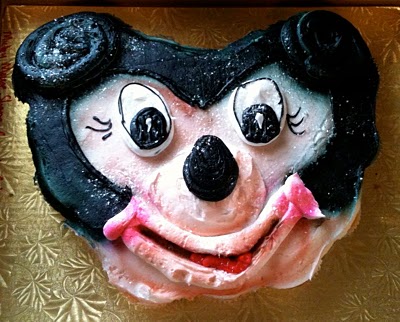
There was one aspect of our Countdown Party which almost got left on the chopping block... party games. Having grown up on horror stories of bad bridal shower games and the Newlywed show, I didn't really think that a party game was necessary. However, early on in planning we thought it would be cute to hide "Mickey"s around the house and have people compete to find them. The game was inspired by the Disney tradition of "Hidden Mickeys":

A Hidden Mickey on a carosel ride at the BoardWalk Resort [src]
The Disney official history goes like this: Hidden Mickeys started in the late 1980’s in Epcot as an inside joke among the Imagineers. Hiding Mickey around WDW was just plain fun! However, Jim Hill (jimhillmedia.com) believes in this "unofficial history": Hidden Mickeys were born as the Imagineers were designing Epcot in the late 1970's and early 1980's. At that time, Disney management felt that the characters belonged in the Magic Kingdom only. The Imagineers disagreed and began slipping Mickeys into Epcot! I suspect that Mickey Mouse designs that were previously in place in WDW (and Disneyland) also became known as Hidden Mickeys. Because of the popularity of HM’s, Imagineers are encouraged to place them in new construction. [src]

We made a list 27 places to place HMs around our house, but by the day of the party, still hadn't made a single one.  I was ready to give up on the project, but M recruited my Dad and began cutting Mickey ears out of construction paper and placing them around any circular object they could find! 

Two HMs "hidden" in our Welcome banner
Magnets disguised as HMs

By the start of the party we had all 27 HMs up, and people actually had a blast trying to find them all.  It gave guests something to do when they first arrived, when everyone's a little awkward anyway.  M's brother and Best Man really took to the challenge and found all 27 within the first half hour!

The other party game we played was a variation of the popular Baby Shower "Pin" game.  As guests walked in we gave them a necklace, and instructed them that if they heard someone say the word "wedding" they could steal their beads.  At the end of the night whoever had the most beads would win.

Our friend Andrew won his necklaces legitimately....
I was the worst at this game, naturally!  People kept trying to steal my necklace, so after a while future-FIL gave me all the beads he'd won just to see how quickly I'd run through them.  :D

All in all, it made me think differently about party games.  While they may seem outdated or cheesy, they really did get people comfortable and talking to each other.  I've been to a few weddings where there are icebreakers during the cocktail hour or rehearsal dinner, and after this experience I think it's definitely something we'll include.

How do you all feel about icebreaker games?  Fun or cheesy?  Are you going to include any at your wedding or at a party?

Friday, June 10, 2011

A Memorabilia Museum

One of the Countdown Party decorations I'd planned from the very beginning was a museum-like display of some iconic Disney memorabilia.  Unfortunately, even though I'd had this idea in mind for over a month, and knew almost exactly what I wanted represented, and even bought and painted the frames weeks before our party...

M was kind enough to spray paint the frames that weren't already gold
...well, you guessed it.  This became a last minute DIY project.  I'm not sure why I procrastinated so long on a project I wanted to complete so badly.  I think I was overwhelmed by the enormity of the task, and afraid that it wouldn't turn out exactly as it looked in my head.

But I shouldn't have worried, because after 3 hours of kneeling on the floor with a hot glue gun while my mom made potato salad (mmmm) my Memorabilia Museum turned out exactly how I pictured it!

A compilation of all the frames and their "captions"

I made six displays using frames I'd found in thrift stores, heavy black poster board, ribbon, and props for each movie.  For inspiration, we picked films that were near and dear to us (Aladdin, Beauty & The Beast, and M's favorite, Lilo & Stitch) and some that were more 'classic' like Cinderella and Snow White.  Our guests loved them, and it made me happy to see people wandering around the perimeter of our backyard (where the frames were prettying up our ugly fence) as if it really was a museum. 


My only regrets came from rushing the project to finish it at the last moment.  Although I never intended them to be permanent works of art, some of the backings were already starting to fall off by the end of the night because I'd hot glued them to the frames so carelessly.  My other nit-picky mistake was how the ribbons looked once they were staple-gunned on.  The little corners and ends of ribbon sticking out past the frames could have been fixed so easily and it would have made for a more polished product.  I wish I'd taken to heart the saying, "If a job is worth doing, it's worth doing well"  - and I certainly will in the future!  But I'm glad that we included this in our party,  and I'm sure those frames will find reuse in our wedding decorations...

Monday, June 6, 2011

Countdown Party Recaps!

Hi everyone, and sorry for the lack of updates last week!  I took off Friday and Monday to prepare for our Countdown Party and spend some quality time with my parents and had every intention of sharing some e-party recaps with you guys on Wednesday.  Well... of course, then my computer crashed in a Blue-Screen-Of-Death kind of way and took the rest of the week to fix.

Kitties are always to blame [src]
But I'm back and I have a ton of pictures and stories to tell about our Countdown Party, which was, in a word, LEGEN - (wait for it) - DARY!

M and I thanking everyone for coming out with a toast
We had about 20 people make it out, including both sets of our parents and several of Matt's groomsmen.  I was worried that having an engagement party 3 months after we got engaged - and hosted in our house, nonetheless! - would seem overkill to some guests, but to my delight everyone loved the idea of our "-1 anniversary" party.  It was really heartwarming to have so many people celebrating our relationship and excited to hear details about the wedding.  To anyone who is wavering about hosting their own e-party, I say go for it!

An epic game of Jenga took place

The day of the party was stressful though, and honestly, I don't think it would have been nearly as successful if my parents weren't there.  My mom cooked pretty much all the food while my dad helped us hang decorations.  I thought I'd been proactive by making some of the decorations ahead of time (like my bunting) but there were still SO many things to do that day!  There were a lot of projects we could (and should!) have made in advance, and a few ideas we had to cut because of time.  Overall, it went off without a hitch, but I learned some important lessons that I'll keep in mind for our wedding.  You hear these again and again in the wedding world, but somehow you don't take them to heart until you experience them yourself.  Things like "accept help and delegate!" and "don't procrastinate!" really do ring true.

Dads are always willing to help taste test!

I'm excited to share some of our last-minute projects and decorations with you guys, and share some ideas for those of you who might be planning your own engagement parties.  Stay tuned!

Wednesday, May 25, 2011

A Quick Bunting Tutorial

The second little detail I conquered for our party wasn't really Disney related at all.  But visions of bunting were swirling around in my head, and I knew our Countdown was the perfect opportunity to try my hand at this adorable darling of the wedding world:

Bundles of bunting!
I haven't measured out how much I made, but I'd estimate it's somewhere around 60ft.  Yikes.  The whole project took me about four nights: two to cut out the triangles, two to glue them on string (or, about 8 episodes of Battlestar Galactica).  Supplies were minimal, just scrapbook paper and embroidery thread - I ended up using ten sheets of paper total.

Materials from acmoore.com
For the most part, I followed the mini-bunting tutorial that Mrs. Stripes posted on Weddingbee.  However, after a day or two of fruitless searching, I couldn't find a diamond or triangle punch for a decent price.  The frugal part of me didn't want to spend $13.99 on a crafty puncher that I'd only use for one project.  So instead, I cut out the pennants using regular scissors.  Here's the easy way to fold and cut your paper for perfect 2" x 1.5" pennants:

Not my photo, but you get the idea [src]
1.  Accordion fold your paper so that each fold is as long as you want your pennants.  For 12"x12" scrapbook paper, this meant folding it 6 times so that each fold was 2" across.

2.  Cut your strip in half, and then fourths.  Now your strip should be 2" x 3", fold it in half one more time:

3.  At this point your paper is about 12 layers thick, but you should still be able to cut it.  Cut from the corners of the short end to the middle of the long end to cut out your triangle:

The benefit of this is that in addition to the 6 pennants you cut out, you get another 3 pennants along the folded edge.  This way, each sheet of paper should yield 32 flags.  Plus, they're pre-folded!

From there, I just used a glue stick and pasted them on my embroidery string at regular intervals.  I liked the look with a little bit of spacing, but you could paste them so they touch, too.  And voila!

Kitties love bunting, too
*All personal photos unless otherwise noted

Monday, May 23, 2011

Countdown to... Countdown!

We're a week away from my and M's 365 Day Countdown Party, which means preparations are in high gear!  (It also means we're almost a year away from our wedding...eek!)  We've been planning this party for almost a month, but somehow there's still a TON to do.  I've been doing my best to tackle some of my DIY projects early on, but of course they're the smallest of details that probably no one will notice but me.  Still, they make me happy and I'm here to share them with you, fellow brides, who understand why vintage teacups and washi tape are absolute essentials.  Right??

As I've mentioned, our Countdown Party is Disney themed.  And what better way to throw a party than to take some inspiration from the wackiest party in Wonderland....

From Disney's Alice in Wonderland

Since learning about bridal blogging, I've swooned over garden-party weddings complete with vintage saucers, but that kind of wedding is not in the cards for us.  However, since our e-party is on a much smaller scale, we can bring a little of that whimsy to life!  I'm thinking vintage teacups to serve punch, and some classic Alice catchphrases:

Drink tags and Washi-tape flags
Punch cups

The drink tags are made with shipping labels and tied with bakers twine.  After my first draft decorating the drink tags I decided to add some flair with a gold calligraphy pen.  The flags are just washi tape wrapped around tall toothpicks with some decorative cuts to the end.  I cut them up with scissors, but I bet if you have a triangle or diamond punch it would go even faster.  I'm planning to stick them into cupcakes or some sturdy hors d'oeuvres. 

The shipping tags, washi tape, and bakers twine I bought from a cute etsy store, Parcel and Paper, who offers an abundance of adorable paper products.  The teacup pictured above was bought at my local thrift store.  I've collected about 20 mismatched teacups so far and I'm looking forward to seeing how they all look together (after a run through the dishwasher...). 

Have you had any dashed wedding plans brought to life in other ways?  How do feel about small details - waste of time, or worth it?

Friday, May 20, 2011

#WINE-ING!

Last Saturday, M's parents invited us over for (as they named it) a "Welcome Y to the Family!" party.  M is the eldest of three boys, so his mom is pretty excited about finally having a girl in the family.  Her and her husband put together a wonderful afternoon of M's favorite foods (teriyaki beef and kalua pig), a whole lotta family, and a wine tasting with wines from our vineyard!  I didn't get to take any pictures because I was so busy getting wedding advice and eating delicious gouda, so you'll have to settle for some pictures of our delicious wine.

Tasting room at OHV
Let me just say, I love the wines at our venue.  When we were picking a vineyard our decision was probably based 60% on aesthetics, 30% on wine, and maybe 10% on other stuff like convenience, price, blah blah blah.  I know, we're terrible.  That said, I felt super lucky that we stumbled on a place with a gorgeous view and a fantastic selection of wines.  Especially since the first day we visited, tasting the wine was about all we could do.

However, I'm well aware that my taste in wines is incredibly biased toward sweet, fruity wines.  So when we first thought about what we'd be serving at our wedding, I immediately voted for the crisp, fruity rosé and the sweeter vidal blanc.  In my mind that fit the requirements of a white and a red and everyone would be happy (especially me).  Luckily, the wine tasting that M's mom organized gave me a lot of insight into what wines his family liked and didn't like, who might drink wine and who would opt for beer/liquor, and just how many wines we should serve.

So without further ado, our first draft at a wine list:


Rosie's Rosé and Vidal Blanc

Woohoo!  Maybe I don't have terrible taste after all!  Rosie's Rosé was almost universally liked by everyone at the party, and was the first bottle to empty after the tasting.  The Vidal was slightly less popular, but definitely won out the whites category (okay, maybe it was the only wine in the whites category).  M's brother/best man liked it the best, as well as a few of his aunts.  And it's certainly my favorite, so I suppose that's worth something...!


Wicked Bottom

I always think of this Chambourcin as OHV's signature red, so I was happily surprised to see that it was the favorite red wine, winning out over their Cabernet Franc and the fruity an Sambradh.   Although I didn't anticipate serving a red wine at our reception, knowing that so many of M's uncles liked it made me think twice. 

[src]


Chambourcin Dessert Wine

Another unanticipated favorite was the dessert wine.  Not pictured on OHV's website, M and I picked up a bottle during our first visit after enjoying it at the tasting.  I didn't think it would appeal to most people since it's very berry sweet, but to my surprise, everyone loved it.  If we have room in our budget, I could definitely see serving a glass during the cake cutting - sort of like the opposite of a champagne toast!

As you can tell, we ended up doubling our list.  Luckily, having our wedding at a vineyard gives us a lot of options for wine.  We could even hold a tasting during the reception if we wanted!  OHV has made it easy for us to pick and choose bottles and aren't limiting us to buy in crate quantities.  Plus if we run out of an unexpected favorite, they'll walk up to the tasting room and grab a few more bottles.  Of course, we'll probably have to do some more "research" at our Countdown Party next weekend, but this was a great start at finding out what wine we should serve.

And thanks Mr. and Mrs. T - you threw us an awesome party!  Can't wait to get down with you guys at the reception!  

What about you guys - what are you serving?  Did you get any input from friends and family?  And have I convinced you VA brides to go buy a bottle of OHV wine yet?  ;)  (pssst:  They sell it at Total Wine...)

All pictures from Old House Vineyard's website, unless otherwise stated.

Wednesday, May 11, 2011

Be Our Guest

I'm pretty sure all our Countdown Party invites are out by now, so time to show them off! :)

I knew from the get-go that I wanted a soft, whimsical looking invite. I wanted balloons like in Up and nothing too overtly Disney. I was digging pastels and ended up using purple and yellow just because I like those colors so much.  I added a light blue so it didn't took too much like wedding-color overload.  And finally, we decided on the phrase, "Be our guest" to clue people in on what we were planning:

Attempt 1 [personal photo]
My first try was with the big round balloons, which I liked, but I really didn't like the weird spacing for the information at the bottom.  M said my balloons looked like lollipops, which is understandable, and although I liked the presence/presents pun, it felt weird to write it in.  To be honest, including anything about presents (even not wanting them) seemed grabby to me.

I made a few changes, came up with a different layout, and added in the free Waltograph font I ended up using on the envelopes:

Final version [personal photo]
On the back, I created a map of our neighborhood since parking is a little weird:

[personal photo]
It wasn't until after everything was printed that I noticed a number of mistakes.  Did you see the big, glaring error?  Here's a hint, it's correct on my first version and terribly, terribly wrong on the final version.  ....That's right, we're hosting a party in the past.  2010 to be precise.  Whoops.  If I had thought through it more I would have changed the wording to "Saturday, May 28" so there would be no confusion, but oh well.  Hopefully everyone will get what we mean. 

The other errors were less important, but still annoying: 
1) I'd really meant to have round balloons like the first draft, but somewhere along the line they got stretched into oval.  Not a big deal, but I wish I'd noticed earlier so I could have fixed it. 
2)  The map on the back is really hard to read where parking/our house is.  If I'd thought it through more, I would have made it bigger.  Luckily most of our guests have been to our house and dealt with the unusual parking situation before.

I'd run the draft by M and my mom, but none of us found these errors until it was too late.  Another lesson learned for invites: show a draft to an uninterested party and triple, quadruple, quintuple check it!

Our final, printed invite [personal photo]

Monday, April 25, 2011

Countdown to Fun

Friends, we are almost 13 months out from the wedding and being a frugal and utterly practical bride (right) I've been very good and refrained from doing too much buying or planning.  But I'm itching to get my DIY craftiness on and start whipping up some adorable decorations and stationary!  So what's a girl obsessed with party planning to do?

Throw an engagement party!

Buying this game probably would have been cheaper [src]
My parents are visiting on Memorial Day weekend this year, and since that nicely coincided with the negative one-year anniversary of our future wedding I bullied them into hosting they graciously offered to host an engagement party.  And by "host" I mean put-their-name-on-the-invite-for-etiquette-reasons since I've already started planning the whole thing and also, it's at my and M's house.

We're calling it our "Countdown" party, a la Mrs. Bruschetta and it's a complete departure from everything we've planned for the wedding so far.  I wanted something whimsical and casual - we'll be barbequing in our backyard, entertaining throughout the house, and friends and family should feel welcome to come and go.  But most of all, I wanted the theme to reflect M and I and some of our shared history.  You all remember my obsession with themes, right?

Here's the thing - M and I love Disney.  We sing duets to "A Whole New World" during car trips, we watch Mulan on rainy days, my favorite coffee mug has Mickey all over it.  Our first vacation as a couple was to Walt Disney World, and we still reminisce about how much fun we had.  So our engagement party will be Disney themed - hopefully in a very classy,  "child at heart" way.

NOT LIKE THIS.  Never like this.  [src]
More details ahead... stay tuned!